Music Video
Skills Audit
Demo Work
Demo Work
Demo Work
Contents
Demo Work
Contents
> Theoretical exploration of the purpose
and application of research
> Secondary research into
music video genres, codes, conventions,
techniques, and theories
> Primary research with the
client to inform ideas development
> Focus group presentation of ideas for
feedback and review via questionnaire
survey

Moving Demo

See the Journal entries for these weeks ->
Proposal
This page displays all of my Pre-Production work. This work was all crucial in planning and preparing myself for my final production. I started by creating much of my creative pre-production, using much of my initial idea development and research in order to develop my idea into a more crafted version. This creative pre-production allowed me to then develop into technical pre-production which allowed me to plan where, how and when my productions would take place. Now that all this pre-production is complete, I am able to properly move into producing my Final Major Project.


Monday 28th March
So the two pieces of work I needed to do were my Proposal and Hollywood style script. I began on my proposal. This is different to my formal proposal that I did at the beginning of my project as this proposal is more as if I was pitching the idea to a company. This was not too hard of a piece of work as lots of the content that needs to be explained on it were things that I have already talked about a few things. And lots of the additional stuff such as target audience and style were helped by the fact that I did research into these sections during my research stage.
Hollywood Style Script
First Draft


Monday 28th March
So for the rest of the day I focused on my Script. I began by writing a brief plan, sectioning my plot into the three acts structure. This being Opening, Middle and End. After I had done this initial planning of the plot, I then did some research into the three act structure so that my final script could be as good as it could be. I made sure to add these references to my Bibliography which has now been updated to my WIX website.


D4Darious (2014) “3 Act Structure - Story Structure Tips - Screenwriting” Available at: 3 Act Structure - Story Structure Tips - Screenwriting - YouTube(Accessed 28th March 2022)
Spaulding R(2020) “How to Write A Short Film Script” Available at:How to Write A Short Film Script - YouTube (Accessed 28th March 2022)
Videomaker (2019) “Practical Advice for Writing a Short Film Script” Available at:Practical Advice for Writing a Short Film Script - YouTube (Accessed 28th March 2022)
After this research, I then made another plan for my script. This was a more expanded version of my initial plan. This version contained more explained versions of the scenes that happened within each act.
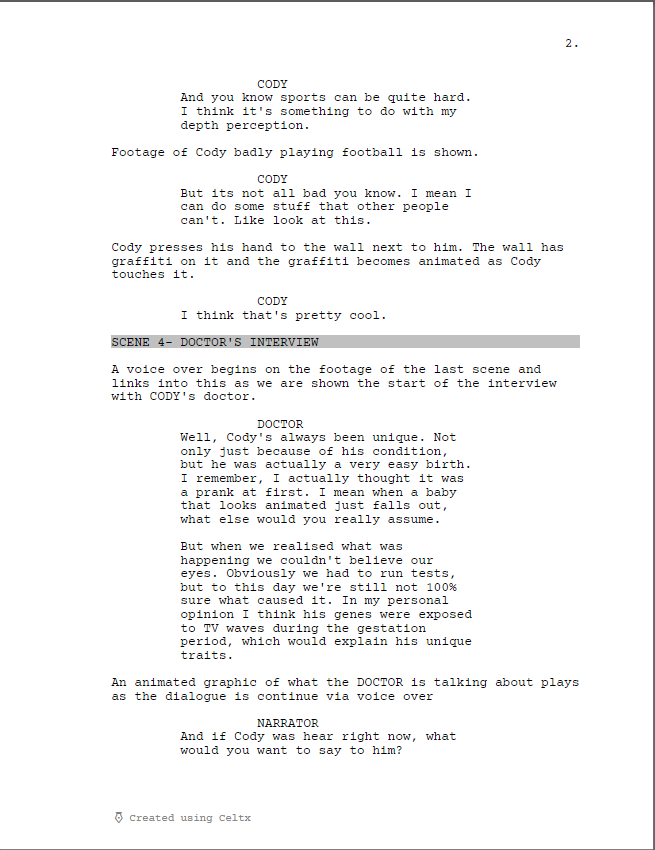
These plans then led to me producing my first draft of my script. Currently the script is 8 pages long, however not all of these pages are full due to the acts separating. So most likely the piece is currently going to be about 6-7 minutes which falls in line with how I planned it.
I was pretty happy with this first draft and getting it completed has really helped me not only set out the plot to the people reading it but also allowed me to understand the plot a little bit better myself.
As I said I’m quite happy with this first draft, but I’m going to get one of the lecturers to read through it and give me some feedback. However, I’m going to use this first draft as a base to start my shot list, storyboards and mark up of the script. This is because it is unlikely the vast majority of my script is going to change. Most likely some dialogue or structure of the script will change. And so being able to start this other work earlier will be more beneficial than having to wait for a completely finished script.
When writing the script I did remove some certain scenes and change others. For example, I completely removed the parents interview, this was mainly as I felt it didn’t really add anything to the plot and just took up extra time which wasn’t really necessary. I also changed how the interaction went at school. Originally it was a completely separate who disagreed with the bully but I felt having it be one of their friends would make the point of people being good more impactful.
I also furthered the idea that the filmmakers were in themselves characters within this “documentary”. To do this I added in a scene of two of them talking when they don’t realise the camera is on, which then helps to explain how they capture Cody storming out of school. Additionally, I gave the director an interview as the documentary starts to fall apart.
I really wanted to further the idea of the original documentary falling apart and that’s really shown through the directors interview. But I’m also considering playing with this theme particularly in the visual style. As the beginning is the documentary going well, that is when the visuals are a lot more professional, particularly using that inspiration with the Netflix Documentaries. However, as the “Documentary” falls apart the camera work may become more shaky and feel like they’re losing budget as the piece falls apart. However, this is only a idea I’m currently considering, so I haven’t decided quite yet how extreme I may take this idea.
Tuesday 29th March
Regarding, the script mark up, I have started the beginning of it. What I mean by this, is I have emailed a copy of my first draft over to one of my lecturers in hope for some feedback. Hopefully, they will get back to me tomorrow and I will be able to properly start my script mark up, based on what feedback I receive. If it takes longer to receive my feedback then that may mean the script mark up would be pushed back a couple days. However, this is not the worst thing as there will be space to fit it in amongst the other work.
Wednesday 30th March
I received an email back from Lainey today in regards to my first draft script that I sent her yesterday. She said that she will read it today and give me feedback on it tomorrow. I thought about it for a bit and have decided to move my script mark up once again to tomorrow and Friday. I felt this made most sense as doing it today would potentially be useless if I was then to be given loads of corrections to do tomorrow. So I have changed this on my action plan and hopefully I shall still have it completed by the weekend.
Thursday 31st March
Lainey was able to give me feedback on my script today which was really useful. She said that she really liked it and felt it was pretty complete. She said the only thing she thought I could benefit from was turning the script into a shooting script. Luckily, I had already planned to complete my shooting script today.
Script Mark up


Thanks to Lainey's feedback, I moved onto marking up my script. This was quite a long procedure as I made sure to go through it several times and to make sure that I talked about everything I felt was important to note on it. I started with looking at my interviews. For many of these, I plan to use two different shot types. My master shot will be a simple mid-long shot where the person will be slightly off centre and they will look just past the camera. This sort of framing is the traditional that is commonly used in most documentary series and so starting with this shot makes the most sense in my attempt to emulate this style. My secondary angle is the going to be a closer mid-mcu at about a 3/4 angle so that the persons side and front of their face is both visible. I will make sure to shoot the correct side of the face so that the eyeline is kept consistent between the two shots. To mark when I would be using these different shots I used different coloured arrows and placed them around the dialogue that would be used for each shot. I felt this was the best way to split up which dialogue sections would be included in each shot.
Although, I am mainly the only person creating and producing this piece, when marking up the script, I used terms such as Art Department, Sound Department and Animated Parts. This is partly to make the script seem more like a professional one, but also I was highlighting these features anyway so these were also the best descriptions for each. For each of these three sections, I gave them a different coloured highlighter. I then went through the script and highlighted sections or parts that were relevant to each of these sections. For example when a character is in a voiceover I highlighted it in the colour for the sound department. The purpose of these section is to highlight the different parts I need to keep consideration of as well as things I may need to create for the scenes, or voiceovers that will go over the top. It also allowed me to add in some things onto the script that weren't there originally.
My penultimate task was adding additional notes. These notes were quite varied and included things such as rough storyboard plans, shot types and more descriptions of the scene. This allowed me to add any additional information that either wasn't there originally or I felt needed to be expanded on. These notes really helped me to expand the story and world a bit more and will aid in the shooting script which can then be more descriptive.
The final thing I completed on my script mark up was to add to more highlighted sections. These sections used a green arrow or purple arrow that were drawn next to their relevant sections. The green arrow was drawn when the scene was using a handheld camera and the purple arrow was for when it's a static camera. This is another way of keeping track of what is needed and happening in each scene and will also help me plan what equipment I'll need for which scenes.
Overall, this script mark up was very helpful in helping me understand my story and expand it a bit more, and it will now allow me to move onto the shooting and audio scripts. But while going through and marking my script, I realised there were a couple of mistakes or parts that could benefit from more description. So even though Lainey said it was very good, I'm going to go back and develop the script more to make my final version. The dialogue will mostly be kept the same, but the descriptions and character actions will be expanded on more. I think this will help the overall story and script as well as helping my actors when I provide them the script for lines.
Final Script


After I had completed my resource list, I updated and improved my script, which I talked about doing yesterday, thanks to my script mark up. This update mainly comprised of adding additional descriptions onto the Actions as well as specifying when a character’s dialogue is off screen. Updating my script is quite useful as it means all my pre-production are all on the same level of detail, as well as the story being at the same level of development for all of my pre-production.
Storyboards
Tuesday 29th March
So, the majority of my day was centered on the beginning of the creation of my storyboards. I started with using my first draft of my script as well as my initial thoughts to roughly plan out the shots I wanted as well as what was happening within the scenes and shots. I detailed all of these within my notebook as I find this the easiest way to collect all my initial thoughts. I split each of the storyboards into their respective Acts and Scenes to make planning easier.
To make the production of these storyboards easier, I have chosen to make them on photoshop. This is what I used for my options project and I felt they came out well. I split each of these photoshop files once again into their respective Acts and Scenes to make structuring the storyboards easier.
Today, at home I used my own drawing pad to draw rough sketches of all of my storyboards. This provides me with a basis of which to draw and colour them properly tomorrow. Although this seems like pushing most of the work to tomorrow. As I will have to draw properly, colour and fill in all the detail tomorrow. However, these initial sketches are actually in my opinion the hardest part of storyboards which is why it was important for me to get them done today. Having this basis down will provide me with a strong base to start tomorrow which will make the production of the work tomorrow a lot more efficient.


Wednesday 30th March
So I then spent the rest of my day completing my Storyboards. And it took quite a while. Yesterday, I had drawn rough versions of each of my storyboards. I spent my whole lesson this morning, adding in the written information that is needed on the storyboards. This took quite a while and I wasn’t about to quite finish it during the lesson. Instead, I was able to finish it by the time I got home.
After I had finished the written information on the storyboards, I then started completing the finished drawings for the storyboards. This also took quite a while, however, it was definitely worth it. Now that the drawings are properly drawn and coloured I feel it will improve the look of my storyboards and make them seem a lot more professional.
When I finished my storyboards, I uploaded them onto my WIX website. Having these storyboards completed is really useful. Having them completed, not only helps to portray my idea to other people as well as myself, but having them completed also allows me to better complete the rest of my pre-production. Particularly the audio script and shooting script which I will look at completing tomorrow.
I decided to split my Storyboards into each separate acts and scenes. This did result with there being some blank squares on certain pages, but I felt in order to have all the information relating to the specific scenes it made more sense to complete it this way. It also allows scenes to be viewed individually as well as viewing the whole thing so it does not impact the original way too much.
Overall, I completed less work today than I had originally planned. However, I think this was probably for the best as it allowed me to put a lot more effort into my storyboards which are a huge part of the pre-production.
Act I
Act II


Act III


Shooting Script


Thursday 31st March
So, I then started creating my shooting script. Using both my script, as well as the storyboards I created yesterday, I was able to fully complete the shooting script in lesson. Similarly to the storyboards, the shooting script will aid me when further planning which shots to shoot when and where as well as helping me to keep track of the story, and how visually it will eventually look. And the shooting script allowed me to take a step further in understanding my own piece, as the storyboards had started in me being able to visualise it.
Audio Script


Thursday 31st March
I then completed a piece of work that goes largely in hand with the shooting script which was the audio script. I was able to use my completed shooting script to aid in the audio scripts production, mainly for the timecodes and visual cue’s. Currently, all the timecodes, visual cues, foley, dialogue and atmospherics are completed in the script. The foley is a lot less in comparison to my previous projects. This is mainly due to traditional documentaries not making too much use of foley as they are traditionally factual pieces. So, I have mainly only incorporated foley into places where I felt it needed to go to emphasise a certain action or where it needed to go in order to serve a purpose in the story. Otherwise the audio is largely, atmospherics, dialogue and music. Regarding the music, I currently have place holders in my audio script in which a brief description of the type of music is contained. This will be updated next week when I have chosen my specific pieces of music. But currently I have just given brief descriptions for what I will look for. And finally, the cu/cut reference. I initially wasn’t 100% sure of what this section meant. So I asked Nigel and he said it was pretty similar to the visual cues. So I have used it in order to really any additional information regarding the audio, for example whether a character is speaking via voiceover or when the cue is very exact. But aside from having to update the music, I have finished my audio script. And I think it had definitely benefited me a lot. Audio can sometimes be a thing people forget about. But by completing this audio script, I have put a lot more thought and consideration into my audio and I’ll be able to keep this in mind, particularly when in production, as I will have this document to refer back to.


Monday 4th April
The final thing I did today was find the music for my piece. I made sure to find copyright free music as I want to upload this final piece to youtube and so using copyright free music means I won’t get copyright striked. And additionally, in many short films with minimal budgets copyright music would be used as it does not cost any money and is free to use. And luckily, while looking I found some quite good pieces of music. There was one account called “LuKremBo” which had lots of free uncopyright music. Lots of the music I found was also in roughly the same genre, being Lo-Fi/Jazz, which is good as this allows the piece to have a consistent style throughout, which is carried by the same genre of music. Thanks to this found music I’ve been able to update my Audio Script with the music pieces and so I’ve been able to upload the fully completed version to WIX.
Resource List


Friday 1st April
I started my day by beginning work on my resources list. I had made one in my options project and so I knew what I was doing. However, I expanded my resource list and this time I added two new columns titled "Acts and Scenes" and "Purpose". These columns add a little more context onto what the props and equipment are being used for. The props I'm using are less expansive than the ones I used in my options project, however in my FMP resource list, I have added in the equipment I will be using as well as I felt this was also relevant and would be useful to also include in there. To discover what I would need and for which scenes, I used my storyboards, shooting script and audio script. These allowed me more information on what is visible in each scene as well as helping me understand which equipment would be needed for each scene. Doing this with my equipment was particularly useful, as I've now got a rough idea of what equipment will be required for each scenes as well as the locations these scenes will be at. This will be particularly helpful in producing my production schedule. Unfortunately, I have not been able to fully complete my resource list, as the final column is the dates I need the equipment from, and I will not 100% know this until I have produced my production schedule. However, I have uploaded the current resource list to my WIX page and I will update it when I have completed my production schedule.
Wednesday 6th April
Completing my Production Schedule also allowed me to update both my location assessments and resource list with the correct dates and they are now updated on my WIX website.
Character Designs
Friday 1st April
My last bit of work for today was character designs. I created character designs for Cody as he is the only character who is animated, this means that in his design I’ll have to pay more attention to the continuity. Whereas for real life characters I can pay attention while on set. I created 5 different character designs for Cody as he has 5 different outfits throughout the piece. These are costumes for scene 1, outside, inside, school and his final breakdown. The main reasons for these character designs are so that I know roughly what I need my Cody actor to wear, so that Ebsynth can better track the clothes. And additionally the character designs will act as colour palettes in order to complete my animation, and keep the colours consistent throughout, especially regarding skin and hair colour.


Style Sheets


The second piece of work I needed to do was my style sheets. I created 5 style sheets for the most important parts that needed style sheets. These were for Cody, Director/Crew, Doctor, School and Animation. I chose these 5 as I felt they were the features I would gain most benefit for making style sheets from. And they are also the pieces that require the most detail and consideration into. These style sheets are slightly similar to my mood boards and will act as a useful aesthetic reference for these characters and locations, especially when I’m preparing to enter production.
Location Assessments

Monday 4th April
Thanks to me visiting many of my locations on Saturday, I was able to make a good start to my location assessments today. This took me the majority of in class time, as I wanted to make sure they were detailed enough. I was able to fill out everything to what I felt was a good amount of detail. However, I wasn't able to fill in the dates/ times that I will be at these locations yet. Similarly to my production schedule, this is because I haven't completed my production schedule yet, which I will be doing on Wednesday. Once I have completed this bit of work, I will be able to come back and finish my locations assessments properly. But for the meantime, I have uploaded the almost completed ones onto WIX.
The only location I couldn't visit on Saturday was College, so I took the photos for that today. I have also emailed Nigel today to ask for permission to film within the College, as well as asking if he could inform me of when the classroom is empty and available so that I could fill in it. It's important to ask him this now, so that I know before Wednesday when I complete my production schedule. Emailing Nigel now and asking permission will hopefully also allow me to get him to sign the location release form later on. I have also gathered permission from my parents to shoot within my house, and this will also be backed up by a location release form by the end of this week. The other two locations do not require location release forms as they are free to use and public property.


Nigel has emailed me back and said that that our classroom is only usually free around lunchtime. This could work but Nigel also said that I could possibly book another empty classroom. I have emailed Nigel back asking about who I should talk to in order to book a classroom. Hopefully Nigel will get back to me and I can try to sort the room out tomorrow so that I’ll be prepared for Wednesday. This means I’ll have to complete the last location assessment when I have a finalised location.
Wednesday 6th April
The other thing Nigel helped me to do this morning was book out a classroom for my production. I now have room C15 booked out for 2 hours on Tuesday 26th April. I was able to go review this classroom and I’m pretty confident it will work. And seeing the classroom allowed me to complete my location and risk assessment for it. However, I was unable to take photos for the location assessment as the classroom was in use. I’m planning to go again tomorrow at lunchtime when it should be empty and then I’ll be able to upload the location assessment to my WIX website tomorrow.
Thursday 7th April
I started my day be revisiting the classroom that Nigel had helped me book yesterday. Luckily today the classroom was empty so I was able to take photos of the room in order to add them onto my final location assessment. Now that I have taken these images, all my location assessments are 100% completed.

Risk Assessments

Tuesday 5th April
Thanks to my completion of Location assessments, shot list and music yesterday, it meant I only needed to complete my risk assessments today. This was not too hard to complete as I have a decent amount of experience with completing risk assessments by now, so I was able to use this prior knowledge to help me complete these effectively.
With my risk assessments done I have now almost finished all pre-production which relates to locations. Currently I only need to fill in the dates on my location assessments and these will be completed by tomorrow or Thursday after I have completed my production schedule.
I have continued to email Nigel from yesterday about booking a room to shoot my college scenes in and we are going to have a chat tomorrow where he can help me look into this. I already know roughly what days and times I will shoot these scenes as to be in line with the timetables of my actors it will likely be the first Tuesday or Second Tuesday back from Easter which is my two weeks of production. And will be during College hours. These are the times the actors are available and there aren’t too many shots within the College room so hopefully this should be plenty of time to get the shots I require.
So by tomorrow all my locations should be figured out.


Shot List


Monday 4th April
Before the lesson ended I started creating my Shot list. At first I thought it was very similar to a production schedule and shooting script but as John told me last week, this is something you would take on set with you. Because of this I sectioned my shot list so that all the shots that take place in the same location are grouped together so that when I take it on production it will be easier to manage. The basis of the shot list is that it contains all the useful information you would need to film the shot. So my current plan is to bring this as well as my storyboards with me when I film as this will mean I will have the proper description and planning in the shot list as well as a visual within the storyboards. At first I was a little hesitant about the purpose of the shot list but now that I’ve made it I understand how useful it can really be now, and I think it will be very useful that I can bring it onto my productions.


Production Schedule


Wednesday 6th April
The rest of my lesson time was dedicated to creating my Production Schedule. This is one of if not the most important piece of technical pre-production as it structures my time for the next month or so. I have talked to my actors and knew when they’re free to film, as working around their college timetables would be a big struggle. I already had an audio recorder booked for Easter, so I structured some of my production with that, when I don’t need any additional equipment. Currently, I have all my production structured across 9 days from the second week of Easter and the two weeks of designated production. I went through several versions of production schedule, but I’m now confident that this final version works. However, I will be 100% checking these dates and times with my actors tomorrow so it could still possibly change slightly, however, I’m confident it should remain relatively the same. Tomorrow is also when I’ll be getting all my talent and location release forms signed.
Completing my Production Schedule also allowed me to update both my location assessments and resource list with the correct dates and they are now updated on my WIX website.
Equipment List


Wednesday 6th April
When I returned home, I started booking equipment as I now knew what days I needed it for. I made notes in my notebook for when I would need certain equipment and I was astonished to see I only needed to book equipment out on two separate occasions. On both occasions, the equipment needed was: Canon DSLR 600d, Tripod, Zoom H4n Recorder, LED Light Kit, Boom Mic and Boom Pole. Other equipment such as the phone gimbal and phone are my own property and so didn’t need to be booked out. The first occasion I have booked is from 12pm on 25th April till 3pm on 26th April. This covers my productions for these two days. And the second days were from 12pm 29th April till 10am 3rd May. This covers the production over the weekend and then my final one on the Monday. On this second booking I was able to book all of the equipment needed. However both the Tripod and LED Light Kit are unavailable for my production on the 25th April. However, to be honest, this is the best day for this equipment not to be available. I have my own tripod, which even though it is worse can still do the job. And the only shot the LED Light kit was needed for was shot 39. So I will film this without lighting and if it turns out bad I will reschedule Production for that shot.
To aid with my equipment booking, I created a table to present which equipment I have booked, what it’s being used for, when I need to pick it up and when I need to drop it off. This will aid me in remembering what equipment I need as well as making sure I don’t return anything late, as I do not want to hinder any other students productions.
The only thing left to do regarding equipment is booking the boom mic and boom pole. These pieces of equipment cannot be booked on the online system and so I am planning to talk to Ash in person about booking them tomorrow. Hopefully, if that goes all well then my equipment booking will be almost completely successful.
Thursday 7th February
When I first got to class, I talked to Ash about how to book the boom mic and pole as I wasn’t available to book these yesterdays as they’re not available to book on the website. Ash told me to email him with when I would need this equipment. So, now that I have emailed Ash this information, I’m hoping this now means that all the equipment is booked. I currently haven’t received an email back from Ash but the email I have sent should be enough to have this equipment booked. So now all my locations and equipment are fully completed which means that all my days of production should run smoothly with everything already prepared.
Call Sheets


Thursday 7th April
I then spent the entirety of the lesson on creating my call sheets which was one of the last pieces of pre-production that I needed to complete. I needed to create nine call sheets, one for each of my production days. These were not too hard to complete, and I was able to use the additional notes that the lecturers had provided us. These notes were able to guide me on some of the points when I wasn’t entirely sure what I needed to do. My production schedule, Script and Shot list were also very helpful in the production of the call sheets. These aided me in knowing what scenes, shots and actors I need for each of my production days. But now that I have completed my call sheets, this is practically all of my pre-production that I needed to complete.
There was a small part of the call sheets that I wasn’t able to 100% complete which was the weather. Most of my productions take place to far in the future for the weather reports to be complete. However, I was able to find a small prediction of what the MET office says about the weather during the weeks of my production. But I shall check the weather before productions and update these call sheets before each of the productions.
Monday 25th April
I had a shoot planned for today, but first I had to have our lesson. I didn’t want to waste these three hours, so I began by updating the call sheets with the new weather, now that the weather apps were predicting weather for my shooting days. This was not too hard to do and was important to complete as it prepares me for my upcoming shoots across this next week.


Release Forms
Monday 4th April
I have also gathered permission from my parents to shoot within my house, and this will also be backed up by a location release form by the end of this week. The other two locations do not require location release forms as they are free to use and public property. I have also began to ask people about being actors and will also have this backed up by talent release forms by the end of the week. Currently, I have a definite Cody, Cameraman and Director as well as a possible Doctor. I know who I will ask for the other characters I just need to get in contact with them. I am hoping by Wednesday I'll have all of my actors so that I can start on the talent release forms.
Tuesday 5th April
I also continued scouting my actors today and now have a definite confirmation for the STUDENT who defends Cody. By the end of the week I should have a signed talent release form from them. For my bully character I am likely going to need to re-dub the voice of the character as the actor cannot film during college time as they go to a separate school. However, I’ve already planned for this as I have been thinking that would be a likely problem. My planning is that I will get a body double in, and make them cover their mouth when the camera pans to them, this will also help to show the fact that the two characters are whispering. Additionally, this was also likely going to have to be done anyway, as due to the high demand that all the equipment will be in, I think it is unlikely that I would be able to book out two audio recorders at one time, as I will need one for Cody’s part within the scene. I have received confirmation for the body double for the Bully and am currently waiting on confirmation from the actor who will dub the voice. Hopefully by the end of the week I will also have them signing talent release forms.
Thursday 7th April
The very last thing on my pre-production were my talent release forms and location release forms. I was able to get all of these signed today by my actors and the location owners. All the people had previously agreed to be part of the production and so these release forms were just the final paperwork that needed to confirm their participation. I was also able to confirm the filming days with the actors and they said that they should be able to do them.
Location Release Forms

Location Release Form for the Cirencester College Location where much of my Act 2 takes place

Location Release Form for the House where a variety of my scenes take place.
Talent Release Forms

Talent Release Form for Sam Bishop who plays the protagonist Cody Soboo

Talent Release Form for Robyn Macarthur who plays the Student who defends Cody

Talent Release Form for Gary Nelson who will provide the Visual body for the Bully

Talent Release Form for Charlie Jones who will provide the voice for the Bully

Talent Release Form for Amanda White who will play the Doctor
Evaluation
Pre-Production is an extremely crucial part of my Final Major Project. It has essentially planned out my life for the next month as I move into proper production and then later post production. And completing this pre-production work now was vital in keeping my Project structured and progressing smoothly.
Pre-Production is split into two major areas. Creative and technical. The creative side deals a lot more with the development of the idea and furthering it. The technical side plans out how the production will happen, including when, where and how it will be produced. To structure my pre-production work well, I decided to start mainly with my creative pre-production.
I felt this was the best way to do it, as progressing my idea and finalising it more before planning how my production would run made a lot more sense in my mind. Thankfully, I was also able to use my knowledge from my ideas development and research in order to develop my idea even more from what it was. Having this solid idea down before planning my production would make understanding what I needed to do a lot easier.
I started my pre-production with making a proposal. This one is slightly different from the formal proposal I created within my Ideas Development. This proposal is structured more similarly to how you would present an idea to a company. I felt this was the best piece of work to start with, as in the real world, if your proposal wasn’t approved you wouldn’t be doing any other pre-production. The proposal also aided me in helping to develop my idea to myself, as describing the synopsis and characters allowed me to structure these aspects a lot more.
This proposal then led to what I felt would be one of the most important pieces of pre-production, the Script. In my opinion, the script is where the idea really starts to develop itself. I started my own script writing by using the Celtx website in order to make sure my script was properly formatted into “Hollywood Style”. I started by writing a first draft of my script, using my proposal and previous work in order to develop the idea and narrative even further. Using this first draft, I then asked one of my lecturers for feedback on it, as well as Marking up the script myself. My lecturer got back to me and said the Script was very good, but in my own Mark up I had discovered some things I wanted to change or improve myself. This then led to me creating my final Script.This final script then allowed me to move onto even more pre-production work, as I was now able to use this script as a basis to build my future work off of.
My next piece was also a very important piece of work, the Storyboards. I had already started to visualise the piece within my head, so this allowed me to fully develop the visual style to my piece. Multiple pieces of previous work really helped me in the creation of my storyboards. My script acted as a basis for the narrative that I would build the Storyboards off of. And much of my research into documentaries and mockumentaries helped me in deciding what shots to use as well as how the camera would work, either handheld or static. This work made creating the storyboards a lot smoother and made the final product feel more informed.
Two pieces of work that then went hand in hand were the shooting script and audio script. Related to my storyboards, these pieces of work also aided in creating the visual style of my piece, as well as the audio script aiding in furthering my planning of the audio style a lot more than I had already done. The audio script also started me thinking about new features of the piece, such as the Foley, atmospherics and music that would need to be included in the final piece. I had done some research into these aspects which had started my insight into these features, but I had not yet properly looked into what I would need. This also allowed me to decide on certain features, such as limited foley and natural atmospherics in order to continue to emulate the documentary style.
These two scripts then allowed me to start creating my Resource List. This details all the props, and equipment I would need. Where and when I would need them as well as why. All of my previous pieces of pre-production helped inform this piece of work. The Script, storyboards and shooting/audio scripts all detailed things that would be included within the piece. Which then allowed me to detail all these features within my Resource List.
For many of my characters, I am letting the actors choose their costumes, as I want the people to feel real, once again pushing the documentary feel. But for Cody, as he is animated, I needed to plan his costumes in advance. In order to do this I created character designs. Throughout the piece Cody uses 5 costumes; Scene 1 costume; outside costume; inside costume; school costume and breakdown costume. I tried to make these costumes different in order to emulate the real sort of clothes that people would wear. But what these character designs also aid in is acting as colour references. Specifically things such as hair and skin colour are important to keep consistent throughout the whole piece. And the colour of the clothes also need to stay consistent between each of the shots. This means, when I come to production, I can use these character designs in order to keep my colours consistent.
Style sheets were what I completed next. These continued in the development of the visual style of my piece. The most important one was the one focused on my animation. I was able to find uses of Ebsynth which looked incredibly similar to how I envision my final piece will look like, and I think it’s really useful to display this visual style during this earlier phase.
Two of the most important pieces for planning are the location and risk assessments. These are super important as this is where all my production days will take place. I have four different locations in which I shoot. Two of these are public property and one is my own house so these were relatively easy to access. However, I had a little bit of a struggle when finding a classroom to shoot in. However, thanks to Nigel, I was able to book a classroom within the College which allowed me to finish off my location assessments. Assessing these locations then allowed me to assess them for risks. This was super important as keeping all crew and cast safe is a high priority. I had made sure to pick locations which I knew weren’t extremely dangerous, so many of the things I detailed on my risk assessments are minor risks and hazards. Completing these two pieces of paperwork really started in helping me to see how my final piece will look, and really felt like I was on the right track.
Related to the locations is the Shot List. This is important as it will act as a guide for me when I’m filming on location. I used the shot list to detail what shots happen where as well as what needs to happen at each of these locations. Completing this piece of work will definitely help me to run my production more smoothly but also aided me in creating my next piece of work, the Production Schedule.
Possibly the most important piece of work when it comes to planning the production is the Production Schedule. This details where and when I’m shooting as well as what’s being shot, who is needed and contingency planning. This was the piece of work where I really felt my production was coming together. Now that I have made it, all my production has been planned. And the production schedule also helped to complete previous pieces of work, such as the location assessment and resource list which required the dates. As well as allowing me to complete the rest of the work that I needed to complete.
A piece of pre-production which I hadn’t originally planned was the Equipment List. However, after creating my production schedule, I was able to book all my equipment. I then created this list as a way to detail and keep track of all the equipment I had booked and when. The table was a creation of my own, and I’m going to make sure to check it before each shoot in order to make sure I have all the equipment I need. This piece of work will then allow me to worry less and make my productions run smoother as I will have access to everything I need.
My penultimate piece of pre-production work acted as a culmination of much of the work that came before it, the Call Sheets. These pieces of work were only able to be made thanks to the previous work I had put into the location/risk assessments, the scripts, the production schedule as well as my resource list. I had also been gathering actors throughout this stage and these call sheets allowed me to detail about them as well. I created 9 call sheets in total, one for each day of production. Similarly to the shot list, these call sheets will aid me on my production shoots, as well as helping all the other people who will be present on the shoot. Creating them now will help me a lot later down the line, especially in helping my productions run smoothly and efficiently.
And my very final piece of work were my release forms, location and talent. These act as confirmations for the actors I’ll be using as well as the places where I’ll be shooting. These are important as they allow me to confirm and display the locations and actors I will be using.
Overall, this pre-production has been hard work but extremely rewarding. All of the work that I have completed during this period will allow my production to run a lot smoother and my idea and planning has developed so much during this section, to the point where it is practically finalised. I’m happy with my pre-production stage and I’m looking forward to heading into my final production.
