Music Video
Skills Audit
Demo Work
Demo Work
Demo Work
Contents
Demo Work
Contents
> Theoretical exploration of the purpose
and application of research
> Secondary research into
music video genres, codes, conventions,
techniques, and theories
> Primary research with the
client to inform ideas development
> Focus group presentation of ideas for
feedback and review via questionnaire
survey

Moving Demo

Monday 2nd May
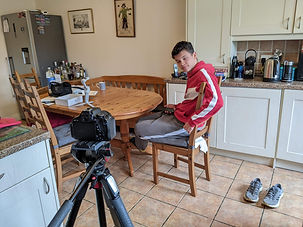
Today was my final day of production. Today’s shoot was quite a mishmash of lots of cutaways, and smaller shots that didn’t easily slot into another shoot. This involved the cutaways for Act 1 Scene 3, the shots for Act 1 Scene 5 and a couple for Act 3. Before production began, I went over the shots one last time to check what I needed to do, but I also decided to change a couple of the things about the shots. Originally, Act 1 Scene 5 was handheld although after all of the work I've done so far, I now feel it makes more sense for it to be static using a camera and tripod. Lots of my other handheld shots are used to display more out of control moments in the story, or shots that look unintentional and I feel by using it for ACT 1 Scene 5 it would start to break up the that motif a little bit. Additionally I planned for shot 37 to be a zoom rather than a pull out. These were some simple changes but something that I felt would make the shots better or blend them in more with the rest of the piece.
To begin shooting, I produced my shots depending on their location. I began with the two shots which both took place within the kitchen location. This included the shots for Act 1 Scene 5 where Cody is eating breakfast and one of the cutaways for Act 1 Scene 3 where Cody drops the cup. These were fairly simple with the first shot only using the camera and tripod and the second making use of my phone and gimbal. I took a couple of takes for each of these and that will provide me with what I needed.
As my phone was already on the gimbal, we then travelled to the garden and shot, shot 11 for Act 1 Scene 3 where Cody struggles playing sports. Once again this was fairly simple and I was able to gather several takes. Me and my actor experimented with a couple of different ways of kicking the ball. Sometimes the actor would just miss the ball completely and other times they would kick the ball but quite badly. These alternative takes give me options later on down the line.
I then moved onto filming the rest of the shots that comprise Act 1 Scene 5. These are of Cody leaving his room, in the bathroom and exiting his house. Once again these shots were fairly simple as they only utilised a camera and tripod. I had to pay close attention to ISO, Aperture and especially white balance between all of these shots. Mainly as all the locations has quite different lighting and so making sure they all looked good in their own ways was important.
I didn’t run into any major problems, but regarding Cody leaving his house I made a small change. After Cody goes past the camera, I panned round and followed him for a bit. This was just something that I felt could look good while I was about to film it. However, in case I later changed my mind, I only started to pan as Cody left frame so if I decide I don’t want to include this change then I can easily cut it out and just use the original stationary shot.
My penultimate shot was of Cody watching the old interviews on his computer. Originally it was a handheld pull out however, I decided I wanted a smoother look to the movement so I changed it to a zoom out still keeping the over the shoulder. As the footage isn’t edited yet it meant, I didn’t want to put the actual interviews onto the computer screens and so instead a placed a green screen on one of the screens so that during post production, I can track the footage onto the green screen. Originally, within Act 2 I was going to include a reference to my options project on a computer behind Cody, however I changed my mind that day and framed Cody where there wasn’t a computer. However, today there was a second screen and so I took this idea from Act 2 and instead implemented it into shot 2. It doesn’t make any major difference to the overall plot but just acts as a little easter egg within the film.
And my final shot was for Cody’s last interview as he talks to the camera. This was the most complicated shot as I used the lighting and audio kit within this shot as well as camera and tripod. My actor was struggling a little bit with the lines here, so to make it easier for them, I shot a couple of takes of them just saying the last line as that is the only part that this footage will be used for. However, just to provide me with options I made sure to get at least one good take of them performing the whole thing. This means I can use either the whole footage or just fade to the one where they only say the last line.
And to finish it all off, I made sure to make a couple of audio recordings of the atmospherics within the location we were shooting as well as in the outside location. This is important for many of these scenes as they will have voiceovers and so getting the atmospherics will help if I need more audio to blend in the background.
Overall, I’m very happy with how the entirety of my production went. The majority of shoots I feel produced results which were exactly what I was aiming for. And I definitely think with all the shots I’ve produced I’ll be able to produce a good version of Cody Soboo: The Animated Man.


Tuesday 3rd May
With my production shoots now completed, it meant I’m left with lots of logging to complete. I’ve previously logged all my other shoots before the ones this weekend. Thankfully this only leaves me with the three shoots from Saturday, Sunday and Monday to log. However this is still quite a lot as a lot of takes and different shots were completed over the course of the long weekend.
And so today, I started on all this logging. And I was able to complete all my logging for the audio recordings. I thought it best to complete all of these first as they are quicker than the visual logging and there were less to log as many of my shots from Monday didn’t need additional audio recordings.
But today, I was able to complete the audio logging for Act 1 Scene 4, Act 1 Scene 5, Act 3 Scene 1 and Act 3 Scene 4. Throughout all these audio recordings there were no obviously terrible ones. The only ones I marked as bad or not to use were ones where the actor stumbled or forgot a line. It’s good to know that the audio is good as audio is a huge part of productions and so making sure my final piece sounds good is important.
Overall, even though there’s a lot less to talk about today, it was still a very useful task to complete. And over the next few days I’ll be able to finish all my logging, which will then allow me to head into post production with a good understanding of all my recordings as well as my log sheets to help guid me on which recordings are good and which ones I should use.


Wednesday 4th May
With my audio logging having been completed yesterday, my task today was logging the visual recordings that I had taken over the long weekend. This included logging for the cutaways for Act 1 Scene 3, Act 1 Scene 4, Act 1 Scene 5, Act 3 Scene 1, Act 3 Scene 3 and Act 3 Scene 4. Although this was quite a lot to log, thanks to my previous projects as well as my work so far in this one, I have gotten quite used to logging and how to log effectively.
And so, surprisingly, I was able to get all my last visual recordings logged today. It did take quite a while but it’s definitely useful getting them all logged today. Not only because it’s allowed me to survey all of my work but also as it allows me to be ahead of my production schedule. Originally, I had scheduled the rest of the week to finish logging and sorting everything out, but now that I've completed logging, I’ll hopefully be able to have a rough cut finished by the end of the week. This would be really good as it will provide me with more time to perfect my animation and audio.
While logging today there weren’t too many shots that were particularly bad. The majority of shots that I marked as bad or unusable were mainly down to either actors forgetting their lines or slightly rough camera movement. The only quite bad shots were in my secondary angle for Act 1 Scene 4 where in a couple of shots the top of the microphone is slightly visible. Annoyingly I didn’t catch this mistake while shooting, however there are a couple of takes without the microphone being visible so I still have good takes of the scene.
When I returned home, I uploaded all my logging onto my WIX website. This was not too hard of a process but it did take a while. All I had to do was screenshot my logging and present them alongside the journal entry that they corresponded with. I decided to order them by Acts and Scenes as this will make navigating them easier.
Similarly to yesterday, there was slightly less to talk about today, however the work completed was still really useful, and I’m looking forward to starting my rough cut in post production over the following couple of days.


Thursday 5th May
With logging all completed yesterday I was ready to move onto post-production. However, before I moved on I made sure to evaluate my Production. Lots of my individual journal entries that I had presented on my production page already covered a lot of my opinions and thoughts about my production shoots and so this final evaluation was really a summary and conclusion of the process as a whole. However, it was still very important to get finished and completing it allowed me to move onto post production.
The best way to start any form of post production is with a rough cut, and so that’s what I created today. I simply chose all my shots and compiled them together. This took the majority of the lesson and still looks very rough but completing it first is important as it allows me to build on it while continuing through post production. Currently, it is literally just the shots all in order, no fancy transitions, the audio is still only the one from the camera, and there’s no animation added yet. It is also currently a little shorter than I had originally predicted, however I think it’s likely it will become slightly longer as I add and adjust parts of it.
I was already ahead of my production schedule and so completing my rough cut today is extremely useful and will allow me even more extra time to fine tune the final piece. With the rough cut completed, I plan to move onto Ebsynth and audio. Originally I had planned to do Audio last and while this will still be true for things such as the music, foley and atmospherics, I think I will fix the dialogue sooner. This is due to how I currently feel about the rough cut, as I feel it will become a lot better when the dialogue from the proper audio equipment is added.
In regards to my Ebsynth it will also really help to bring the piece to life, as currently it is just a normal person. But I can only complete the Ebsynth work at home as that is where I have the software downloaded. However, there are parts I can complete at school. And I started doing this today. Thanks to having my rough cut, I was able to copy the whole sequence into a separate premiere file and delete all the pieces that didn’t include parts which would require Ebsynth. Then using this new sequence, I was able to export the shots out 1 by 1 into separate folders to provide me with all the shots I need to use Ebsynth for. This will allow me to work a lot more efficiently when I come to completing the Ebsynth work as I’ll already have all my shots laid out and ready to edit with. Additionally it allows me to work with them separately which will make handling any problems a lot easier. However, separating them has made me realise how many of them there are. Which is 32 separate shots that need Ebsynth. I feel this is going to be quite a challenge and will probably take a while so I might try to start Ebsynth work earlier as I feel I may have to multitask with doing certain parts of the edit at college and then spending the rest of my time at home completing the Ebsynth. Especially as the Ebsynth is crucial to the final product.
Overall, today was only the very start to my post production work, but I feel I have made a good start. And I feel the work I have completed today will allow the rest of my editing to run a lot more smoothly and efficiently.


Friday 6th May
As I discussed in yesterdays journal entry, all my Ebsynth work needs to be conducted at home, which means I have my time at College to focus on other aspects of the editing process. And that’s exactly what I did today. And using my rough cut yesterday, I chose to work on adding the microphone’s recordings. This included the voiceovers as well as correcting all the dialogue and changing it from the camera’s audio to the recording from the proper microphones.
My process for completing this was as follows. I would copy the scene that I was changing audio. I was then able to use my logging forms to figure out which audio recordings related to the footage I had chosen. Then using the hand claps that I made sure to do while filming, I was able to sync the footage of the hands touching and time it with the sound of the clap on the audio recording. I’d had a good amount of practice in syncing audio from my options project and so I was able to complete the audio recordings with little issues.
I completed these audio recordings in chronological order starting with Act 1 Scene 3. For the majority of the audio recordings I added a slight denoise effect which helps to reduce the buzz of the background noise. In certain scenes you can still hear a slight buzz, however this will become less easily recognisable when the atmospherics and music is added, as they will help to blend the different audio tracks.
As well as the dialogue recordings I made sure to add in the voiceovers as well. This was slightly easier as they didn’t have to be synced with any mouth movement. However, it did lead to me changing the structure of the piece a little bit. I had to lengthen the childhood images to fit the voiceovers but I think when they get the extra style and transition it would’ve needed to be longer anyway. Additionally Act 1 Scene 5 was longer than the voiceover, so I cut the breakfast shot slightly shorter, as I felt it was running longer anyway. I also added the start of Cody’s school voiceover into Act 1 Scene 5 to help bridge the gap between the scenes. Finally, I couldn’t find a good place to include Director’s voiceover for Cody’s school, so currently it isn’t implemented. I simply couldn’t find a good place today, but I will try to fix this in the future.
Yesterday for my rough cut I had used a certain shot for Act 2 Scene 1 where Cody hears the bully talking about him. On the audio logging sheet, I had mentioned that there was a drilling sound in the background, but I had hoped that I’d be able to remove it in post as that was the best visual looking shot. However, after experimenting with the denoise effect and some other effects, I couldn’t find a way to remove it without ruining the rest of the audio. So instead I implemented my second best recording. However, one way I improved it was by still using the second half of the first shot. As a cut had to be made anyway for the quick pan, I was able to keep the second half of the better shot and just use the first half of the other one. This actually means there’s not to big as a difference as the second half was the better looking half, and so it’s good that I was able to keep that. But keeping the audio a lot better was more important than an ever so slightly better performance.
For Act 2 Scene 3 I decided to use a mix of the pre-recorded dialogue between the cameraman and the boom operator as well as the spare recordings of Cody saying “Leave Me Alone”. I chose to do this as I wasn’t a huge fan of the performance’s in the original recording. However this was fairly easy to do for 2 reasons. For one neither the cameraman or boom operators faces are shown and when Cody speaks he’s far away from the camera, and when he’s animated seeing his mouth move will be even harder. However, this was good as it allowed me to blend in the different audios a lot easier, and I believe it definitely sounds better now.
Additionally as I mentioned a couple of days ago, I was thinking of flipping the Doctor’s interview so that they were on frame right. I tried that out today, and it didn’t look too bad but I decided to keep it framed left. However, I think part of the reason I may not have liked it is due to the fact I was used to it being framed left. So next week I am going to ask one of my lecturers for their opinions as they will be less biased than I am.
Overall, getting the microphone dialogue added in today was definitely the right choice. It certainly helps to bring the piece more to life and helped me structure my piece a bit better, especially in regards to the voiceovers. I exported this version as well in order to demonstrate the evolution that the rough cut has made from yesterday. And over next week I’ll be able to continue working on the audio as well as the transitions and style of the visuals.
When I returned home, I continued doing some more work for the Ebsynth part of my post production. After fixing some of the shots from yesterday, such as Act 2 Scene 1 now that I have changed it, I converted all of the shots into the PNG sequences. This took quite a while as exporting them from Premiere wasn’t fast. But doing this today will allow me to move onto selecting and drawing my keyframes. I plan to start drawing my keyframes over the weekend and hopefully by Monday I’ll have some Ebsynth shots to add into my Rough Cut.


Saturday 7th May
Now realising how long Ebsynth animation will likely take me, I decided to start today. And I felt it would be best to start with things that I would count as slightly easier animation, as that would provide me with more practice and experience to work my way up to the more complex animations. And after looking over the shots, I felt a good place to start would be with Act 1 Scene 3, Cody’s first interview. This is mainly comprised of static shots, but still has some more complex movements which should provide me with a decent challenge.
And so I started with shots 7, 8 and 10 as these were the easiest shots. Each of these shots I only used one keyframe for. And for all of my work today, I have created timelapses to demonstrate the way I made them. Shots 8 and 10 were particularly easy, and this was most likely due to the fact they were more close up and required less movement, as they were both in the secondary angle. In fact I’m very happy with these two shots and I’m hesitant to change them at all in fear of just making it worse. Shot 7 was a little bit harder as it’s more movement of the body and less close up than the previous two. However I still only used one keyframe. Currently, I think it looks alright, but there is the slight glitching and dragging of the animation which is something I discovered in my primary research. In regards to the glitching, when it’s only a minimal amount I don’t feel it looks to bad as long as the main body of Cody looks ok. Currently my plan is to make each of the animation shots so that they cover the body and the character looks good. Then unless the glitching is absolutely horrible or ruins the footage I will just leave it in for now. Otherwise I feel I will get too stuck on one shot and not leave myself enough time to complete the others. Then if I have enough time I’ll go back and create more keyframes for the ones that need it, which should then reduce the glitching.
Alternatively, I have a work around for if I do not have enough time to completely fix the glitching. At the start of many documentaries they sometimes have a warning or a brief summary of what is contained within this piece. If the glitching is still obvious my plan is to create one of these warning screens and write something along the lines of “Cody suffers from a fictitious ailment which glitches the line between reality and animation”. That way the slight glitchiness effect will be explained before it’s even seen. Obviously, I would make the final one sound better as it still has to keep in line with the rest of the narrative, especially the doctor’s interview, but that is my back up plan in case I can’t completely solve the glitchiness.
One last thing I noticed when creating these first 3 shots was that the footage that Ebsynth produces is ever so slightly shorter than the original footage. At first I was slightly concerned about this, but then I realised, if I just add the last frame again onto the end of the footage then it becomes the same length without noticing the copied frame, and so luckily that problem was relatively easy to solve.
I then moved onto shot 12 which turned out to be a real challenge. This is the end of the interview where Cody touches the wall, and the amount of movement turned out to be a real struggle. Originally I used two keyframes and these turned out ok, but only for about the first half of the footage and then in the second they struggled. So instead I created two more keyframes focused around the end of the piece. When inputting them into Ebsynth I made sure to apply them to the whole footage so that even though they would glitch in parts, lining them up would be easier. With these two new keyframes, I had four lots of animation to work with. In premiere, I spliced them up and used the best bits of each to create the final product. This was quite hard, and timing definitely became an issue as the actor’s body had to be covered by the animation so lining all the different shots up in time with the original footage was very important. In the end I’m relatively happy with the outcome and I feel it passes as ok but it’s definitely one I think I will come back to and work on a little more. Although doing this shot today will probably turn out really useful as understanding how to work with multiple keyframes and cutting them all together will definitely be a thing I will have to do several more times throughout the animating process.
After all the interview shots were completed, I went back and did the cutaways for Act 1 Scene 3. This started with shot 9 where Cody picks up and drops the cup. Unlike the interview shots, I could use a green screen instead of blue screen this time as Cody’s clothes were not green. Mentioning Cody’s clothes, I had to slightly adapt the outfit for the cutaways as my actor was wearing a hoodie and not just a t-shirt due to the temperature on the day of filming. This doesn’t impact the piece much but is something to take into account, especially if he needs to wear the same outfit later on. The only challenge for shot 9 was the fact Cody interacts with a real cup. Originally I kept the green screen around the cup however when I ran that through Ebsynth it messed with the animation. So, instead I went back and removed the cup from the keyframe. Then in premiere I created a duplicate layer of the real footage and used an opacity mask on the cup so that only it was visible. Applying this layer over the animation allows the cup to be seen. Currently, I think this shot looks a bit rough so it’s likely I’ll come back and try to do more work on it.
And my final shot was shot 11. Originally I was very scared to do this as I thought the movement would put up quite a challenge. However, with the three keyframes I chose, Ebsynth was actually able to create a pretty good rendition. I once again used a mixture of the three shots like I did for shot 12 and I would say this is one of the shots I’m most proud of today. There’s still a couple of frames where I think I’ll come back and work on it as sometimes the actor’s leg is slightly visible but overall I’m pretty happy with this shot.
In conclusion, today was quite a lot of work, but I’m pretty happy with the results. What I’ve learnt most today is the way I’m going to need to work with Ebsynth. Thanks to the work today, I’ve realised that not all of these animations will be perfect. That’s why, as I mentioned earlier, I will prioritise getting all the Ebsynth shots to a stage where I’m happy with them. Then once I have spare time I will come back and clean them up. This method should allow me to create better looking animated shots without having to sacrifice any other features of my piece.
Sunday 8th May
Continuing with my Ebsynth work today, I completed two more shots. These are some of the last shots that I view as easy to create, as they are both interview ones with little movement.
The first shot I started with is actually the last shot of the piece being Shot 39 where we cut back to Cody for his final lines of his final interview. I was honestly really surprised with how easy this shot was to create. I had planned to use only one Keyframe although I thought it was likely that I would have to use another just to fix any minor errors. However, once I’d gone through the process of drawing the keyframe in Photoshop and then running it in Ebsynth, the final outcome was actually pretty good. Once I got it into Premiere I realised there weren’t any glaring errors that really need to be fixed. Mainly the only trouble was getting the animation lined up in time with the live action footage. But once that was completed I was actually very happy with the results. There are a couple of glitches, for instance near the end the chin fades away a bit, but these are really minor and unless I have lots of spare time it’s unlikely I’ll go back and change them.
My second shot for today turned out how I expected Shot 39 to turn out. The other interview shot I decided to do was shot 28 where Cody gets interrupted mid interview. Once I’d done my first keyframe and ran it through Ebsynth, I realised the mouth for the first half of the animation was quite glitchy. To fix this error, I went back and created another keyframe using a frame from earlier in the shot. After creating this keyframe and running it through Ebsynth, I was able to use the same technique I used yesterday and use a combination of the two different animations to create the final look. Timing the animation with the live action footage was a lot harder in this shot than previous ones and it took me a little while to get it more in time. I also decided to size up the animation slightly to 102% as that helped to just cover the live action body underneath without being too noticeable or ruining the framing. I am happy with this shot, although I think I may go back and try to line it up a bit better with the live action footage. But the animation itself I’m pretty happy with.
Overall, today was probably the last day of easy Ebsynth shots, but I am very happy with the results. I’ve calculated that if from tomorrow I do 4 Ebsynth shots a day then I’ll have all the shots completed by next Saturday which will then keep me in line with my production schedule as well as providing me with the spare time I need to go back and fix some of the glitches and errors. As I have to do Ebsynth at home this means my time in lesson can be devoted to other aspects of post production which should then help me stay ahead of my production schedule and reduce my workload a little bit for the last week of post-production which should then allow me to focus on fixing errors in my previous editing.
